Containerization and container orchestration are two of the most essential technologies for modern software development. These technologies have revolutionized the way we build, deploy, and manage applications. In this article, we will provide a beginner’s guide to containerization and container orchestration using Docker and Kubernetes.
What is Containerization?
Containerization is the process of encapsulating an application and its dependencies into a single package called a container. The container provides a consistent and isolated environment for running the application. The containerization technology enables the developers to build, test and deploy applications more quickly and reliably.
What is Docker?
Docker is a containerization platform that provides an easy and efficient way to build, ship, and run containers. With Docker, you can package an application along with its dependencies and runtime environment into a container. Docker containers are lightweight, portable, and can run consistently across different environments.
How to Create a Docker Container?
Creating a Docker container involves the following steps:
Step 1: Create a Dockerfile
A Dockerfile is a simple text file that contains instructions for building a Docker image. The Dockerfile specifies the base image, copies the application code, installs the dependencies, and exposes the required ports.
Step 2: Build a Docker Image
Once you have created a Dockerfile, you can build a Docker image using the Docker build command. The Docker build command reads the instructions from the Dockerfile and creates a Docker image.
Step 3: Run a Docker Container
Once you have created a Docker image, you can run a Docker container using the Docker run command. The Docker run command starts a new container based on the specified Docker image.
What is Container Orchestration?
Container orchestration is the process of managing, deploying, and scaling containerized applications. It involves managing the lifecycle of containers, scheduling containers on a cluster of nodes, and ensuring that the containers are running and healthy.
What is Kubernetes?
Kubernetes is a container orchestration platform that automates the deployment, scaling, and management of containerized applications. Kubernetes provides a platform-agnostic way of deploying and managing containers.
How to Use Kubernetes?
Using Kubernetes involves the following steps:
Step 1: Create a Kubernetes Deployment
A Kubernetes deployment defines how many replicas of a container should be running and what container image to use.
Step 2: Create a Kubernetes Service
A Kubernetes service provides a stable IP address and DNS name for accessing the containers.
Step 3: Scale the Kubernetes Deployment
Kubernetes provides a simple way to scale the deployment up or down, depending on the traffic.
Step 4: Monitor the Kubernetes Deployment
Kubernetes provides several tools for monitoring the containers, including logs, metrics, and events.
Conclusion:
Containerization and container orchestration are critical technologies that have transformed software development. Docker provides an easy and efficient way to package and run containers, while Kubernetes automates the deployment, scaling, and management of containerized applications. By using Docker and Kubernetes, developers can build, test, and deploy applications more quickly and reliably. We hope that this beginner’s guide has provided you with a good understanding of containerization and container orchestration.
In this article, we will walk through how to set up a CI/CD pipeline for a serverless application using the Serverless Framework. The pipeline will use GitHub Actions as the CI/CD tool and AWS as the cloud provider. By the end of this article, you will have a fully functional CI/CD pipeline that can automatically deploy your serverless application whenever you push changes to the main branch of your GitHub repository.
Overview of Serverless Framework
The Serverless Framework is a popular open-source framework for building serverless applications. It supports multiple cloud providers such as AWS, Azure, and Google Cloud Platform, and allows developers to easily create, deploy, and manage serverless applications.
Serverless applications consist of small, independent functions that are deployed and executed on-demand, without the need for managing server infrastructure. The Serverless Framework abstracts away much of the complexity of serverless application development, providing developers with a simple and intuitive way to build scalable, resilient, and cost-effective applications.
Setting up the Project
Before we start setting up the CI/CD pipeline, let’s first create a simple serverless application using the Serverless Framework. For this example, we will create a serverless application that provides an HTTP API using AWS Lambda and API Gateway.
First, make sure you have the following prerequisites installed on your machine:
Node.js (version 12.x or higher)
Serverless Framework (version 2.x or higher)
AWS CLI
To create a new Serverless project, open your terminal and run the following command:
{
  "message": "Go Serverless v1.0! Your function executed successfully!"
}
Setting up GitHub Actions
Now that we have a working serverless application, let’s set up a CI/CD pipeline to automatically deploy changes whenever we push code to GitHub. We will use GitHub Actions as our CI/CD tool.
First, create a new repository on GitHub and clone it to your local machine:
git clone https://github.com/<your-username>/<your-repo-name>.git
cd <your-repo-name>
Next, create a new file in the root of your repository called .github/workflows/deploy.yml. This file will contain the definition of our GitHub Actions workflow.
Before we can use our workflow, we need to configure some secrets in our GitHub repository. These secrets will allow our workflow to authenticate with AWS and deploy our serverless application.
To configure the secrets, go to your GitHub repository and click on “Settings”. Then, click on “Secrets” and click “New repository secret”.
Create two new secrets with the following names:
AWS_ACCESS_KEY_ID: Your AWS access key ID
AWS_SECRET_ACCESS_KEY: Your AWS secret access key
Make sure to keep these secrets private and do not share them with anyone.
Testing the Workflow
Now that we have our workflow and secrets configured, let’s test it out by making a change to our serverless application and pushing it to GitHub.
Open the handler.js file in your my-service directory and modify the response message:
Once you push your changes, GitHub Actions will automatically trigger a new build and deployment. You can view the progress of the workflow by going to your repository’s “Actions” tab.
Once the workflow completes, you can test your updated serverless application by invoking the API endpoint:
In this article, we walked through how to set up a CI/CD pipeline for a serverless application using the Serverless Framework and GitHub Actions. By following the steps outlined in this article, you should now have a fully functional CI/CD pipeline that can automatically deploy changes to your serverless application whenever you push code to GitHub.
Using a CI/CD pipeline is essential for ensuring that your serverless applications are deployed reliably and consistently. By automating the deployment process, you can reduce the risk of human error and minimize the time it takes to get your applications into production.
In today’s world, monitoring your application is more important than ever before. As applications become more complex, it becomes increasingly challenging to identify bottlenecks, troubleshoot issues, and optimize performance. Fortunately, OpenTelemetry provides a powerful framework for collecting, exporting, and processing telemetry data, making it easier to gain insight into your application’s behavior. In this article, we’ll provide a crash course in OpenTelemetry, explaining what it is, how it works, and how you can use it to monitor your applications.
What is OpenTelemetry?
OpenTelemetry is an open-source framework that provides a standard way to collect, export, and process telemetry data for distributed systems. It supports various languages and platforms, making it easy to integrate into your existing applications. The framework consists of three main components: the SDK, the OpenTelemetry Collector, and the exporters.
The SDK is responsible for instrumenting your application code and collecting telemetry data. It provides libraries for various languages, including Java, Python, Go, and .NET. The SDK also supports various metrics and trace APIs, allowing you to customize the telemetry data you collect.
The OpenTelemetry Collector is responsible for receiving, processing, and exporting telemetry data. It provides a flexible way to ingest data from various sources, including the SDK, third-party agents, and other collectors. The Collector also provides various processing pipelines for transforming and enriching the telemetry data.
Finally, the exporters are responsible for sending the telemetry data to various backends, including observability platforms such as Prometheus, Grafana, and Jaeger.
How does OpenTelemetry work?
OpenTelemetry works by instrumenting your application code with the SDK, which collects telemetry data and sends it to the OpenTelemetry Collector. The Collector then processes the data and exports it to the backends specified by the exporters. This process allows you to gain insight into your application’s behavior, identify issues, and optimize performance.
Let’s take a look at an example. Suppose we have a simple Python application that runs on a server and provides a REST API. We want to monitor the application’s performance, including the request latency, error rate, and throughput. We can use OpenTelemetry to collect this data and export it to Prometheus for visualization and analysis.
First, we need to install the OpenTelemetry SDK for Python:
Next, we need to instrument our application code with the SDK. We can do this by adding the following lines of code:
from opentelemetry import trace
from opentelemetry.instrumentation.wsgi import OpenTelemetryMiddleware
from opentelemetry.sdk.trace import TracerProvider
from opentelemetry.exporter.prometheus import PrometheusMetricsExporter

# Initialize the tracer provider
trace.set_tracer_provider(TracerProvider())

# Create the Prometheus exporter
exporter = PrometheusMetricsExporter(endpoint="/metrics")

# Add the Prometheus exporter to the tracer provider
trace.get_tracer_provider().add_span_processor(
    BatchExportSpanProcessor(exporter)
)

# Instrument the WSGI application with OpenTelemetryMiddleware
app = OpenTelemetryMiddleware(app)
This code initializes the tracer provider, creates a Prometheus exporter, adds the exporter to the tracer provider, and instruments the WSGI application with OpenTelemetryMiddleware. Now, every request to our API will be instrumented with OpenTelemetry, and the telemetry data will be exported to Prometheus.
Finally, we can use Prometheus to visualize and analyze the telemetry data. We can open the Prometheus web UI and navigate to the /metrics endpoint to view the exported data. We can then create graphs, alerts, and dashboards to monitor our application performance and identify issues.
Why use OpenTelemetry?
OpenTelemetry provides several benefits for monitoring your applications:
Standardization: OpenTelemetry provides a standard way to collect, export, and process telemetry data, making it easier to integrate with various platforms and tools.
Flexibility: OpenTelemetry supports various languages, platforms, and backends, making it easy to use with your existing infrastructure.
Customization: OpenTelemetry provides various APIs for customizing the telemetry data you collect, allowing you to monitor specific aspects of your application’s behavior.
Open-source: OpenTelemetry is open-source and community-driven, ensuring that it remains relevant and up-to-date with modern monitoring practices.
Interoperability: OpenTelemetry integrates with various observability platforms, making it easy to share telemetry data across your organization.
Conclusion
Monitoring your applications is essential for identifying issues, optimizing performance, and ensuring a good user experience. OpenTelemetry provides a powerful framework for collecting, exporting, and processing telemetry data, making it easier to gain insight into your application’s behavior. By using OpenTelemetry, you can standardize your monitoring practices, customize the telemetry data you collect, and integrate with various observability platforms.
Software developers aim to create applications that are easy to maintain, extend and test, and that can adapt to changing requirements. However, software design can be complex and challenging, and it is important to follow established principles and best practices to create effective, high-quality software. One set of principles that has gained widespread recognition and adoption in the software development community is known as SOLID principles. In this article, we will explain what SOLID principles are, why they are important, and how to apply them in your software development projects.
What are SOLID principles?
SOLID is an acronym that stands for five principles of object-oriented programming (OOP). These principles were first introduced by Robert C. Martin in the early 2000s as a set of guidelines for writing effective, maintainable, and scalable software. The SOLID principles are:
Single Responsibility Principle (SRP)
Open/Closed Principle (OCP)
Liskov Substitution Principle (LSP)
Interface Segregation Principle (ISP)
Dependency Inversion Principle (DIP)
Each principle is designed to address a specific aspect of software design, and they work together to create a foundation for building high-quality, maintainable software applications.
Single Responsibility Principle (SRP)
The Single Responsibility Principle states that a class should have only one reason to change. This means that each class should have a single responsibility or job, and that responsibility should be encapsulated within that class. This makes the code more modular, easier to understand, and easier to maintain. When a class has more than one responsibility, it becomes more difficult to modify and test, and changes to one responsibility may unintentionally affect other parts of the code.
Open/Closed Principle (OCP)
The Open/Closed Principle states that software entities (classes, modules, functions, etc.) should be open for extension but closed for modification. This means that you should be able to add new functionality to a system without modifying the existing code. This principle is essential for building scalable and maintainable software, as it allows you to add new features without disrupting existing functionality. This can be achieved through the use of abstractions, such as interfaces or abstract classes, which provide a contract for how the system should behave.
Liskov Substitution Principle (LSP)
The Liskov Substitution Principle states that a derived class must be substitutable for its base class. This means that any object of the base class should be able to be replaced by an object of the derived class without affecting the correctness of the program. This principle is important for ensuring that software is robust and maintainable, as it allows developers to make changes to the implementation of a class without affecting the behavior of the rest of the system.
Interface Segregation Principle (ISP)
The Interface Segregation Principle states that clients should not be forced to depend on interfaces they do not use. This means that interfaces should be small and focused, and should only contain methods that are relevant to the clients that use them. This principle is important for creating maintainable and scalable software, as it reduces the impact of changes to the system by limiting the dependencies between different parts of the code.
Dependency Inversion Principle (DIP)
The Dependency Inversion Principle states that high-level modules should not depend on low-level modules. Instead, both should depend on abstractions. This means that you should depend on abstractions, such as interfaces, rather than on concrete implementations. This principle is important for creating maintainable and flexible software, as it allows you to change the implementation of a class without affecting the rest of the system.
Why are SOLID principles important?
The SOLID principles provide a set of guidelines for creating software that is easy to maintain, extend, and test. By following these principles, developers can create software that is more robust, adaptable, and scalable, with a reduced risk of introducing bugs or unexpected behavior. In addition, adhering to SOLID principles can make the code easier to understand and modify, which can be especially important for teams working on large or complex projects.
Applying SOLID principles in practice
Now that we have a better understanding of what SOLID principles are and why they are important, let’s explore how to apply them in practice. Here are some tips for applying each of the SOLID principles in your software development projects:
Single Responsibility Principle (SRP)
To apply the Single Responsibility Principle, you should start by identifying the different responsibilities of each class in your system. If a class has more than one responsibility, consider breaking it up into smaller, more focused classes. You can use the following questions to help identify the responsibilities of a class:
What does the class do?
What does it depend on?
What depends on it?
Can its responsibilities be separated into smaller, more focused classes?
Open/Closed Principle (OCP)
To apply the Open/Closed Principle, you should use abstractions such as interfaces or abstract classes to define the behavior of your system. By depending on abstractions rather than concrete implementations, you can make your system more flexible and easier to extend. Here are some tips for applying the Open/Closed Principle:
Define interfaces or abstract classes that define the behavior of your system.
Implement concrete classes that conform to the interface or abstract class.
Use dependency injection to allow different implementations to be substituted at runtime.
Avoid making changes to existing code when adding new functionality.
Liskov Substitution Principle (LSP)
To apply the Liskov Substitution Principle, you should ensure that derived classes can be substituted for their base classes without affecting the behavior of the system. Here are some tips for applying the Liskov Substitution Principle:
Ensure that the derived class implements all the methods of the base class.
Ensure that the derived class does not introduce new behaviors that are not present in the base class.
Ensure that the derived class does not violate any invariants of the base class.
Use unit tests to ensure that derived classes can be substituted for their base classes without affecting the behavior of the system.
Interface Segregation Principle (ISP)
To apply the Interface Segregation Principle, you should ensure that interfaces are small and focused, and that clients only depend on the methods they use. Here are some tips for applying the Interface Segregation Principle:
Create interfaces that are small and focused.
Ensure that each interface only contains methods that are relevant to the clients that use it.
Avoid creating “fat” interfaces that contain methods that are not relevant to all clients.
Use composition rather than inheritance to avoid creating interfaces with unnecessary methods.
Dependency Inversion Principle (DIP)
To apply the Dependency Inversion Principle, you should depend on abstractions rather than concrete implementations. Here are some tips for applying the Dependency Inversion Principle:
Define interfaces or abstract classes to represent the dependencies of your classes.
Use dependency injection to inject the dependencies into your classes at runtime.
Ensure that your high-level modules depend on abstractions rather than concrete implementations.
Use inversion of control containers to manage the dependencies in your system.
Conclusion
The SOLID principles provide a set of guidelines for creating effective, maintainable, and scalable software applications. By following these principles, you can create software that is easier to understand, modify, and test, with a reduced risk of introducing bugs or unexpected behavior. Although it may take some time and effort to apply these principles in practice, the benefits are well worth it, especially for larger or more complex software projects. If you’re new to SOLID principles, start by focusing on one principle at a time and gradually incorporating them into your development process. Remember that SOLID principles are not a set of hard and fast rules, but rather a set of guidelines to help you create better software. As you gain experience and confidence, you can adapt and adjust these principles to suit your specific needs and requirements.
In addition to the SOLID principles, there are other design principles and best practices that can help you create effective, maintainable, and scalable software. These include principles such as Don’t Repeat Yourself (DRY), Keep It Simple Stupid (KISS), and You Ain’t Gonna Need It (YAGNI), as well as practices such as code reviews, automated testing, and continuous integration and deployment. By incorporating these principles and practices into your development process, you can create software that is more efficient, effective, and reliable.
In conclusion, SOLID principles provide a framework for creating software that is well-designed, maintainable, and scalable. By following these principles, developers can create software that is easier to understand, modify, and test, with a reduced risk of introducing bugs or unexpected behavior. While it may take some effort to apply these principles in practice, the benefits are well worth it in terms of creating software that is more efficient, effective, and reliable. By incorporating SOLID principles and other best practices into your development process, you can create software that is not only functional but also well-designed and maintainable over the long term.
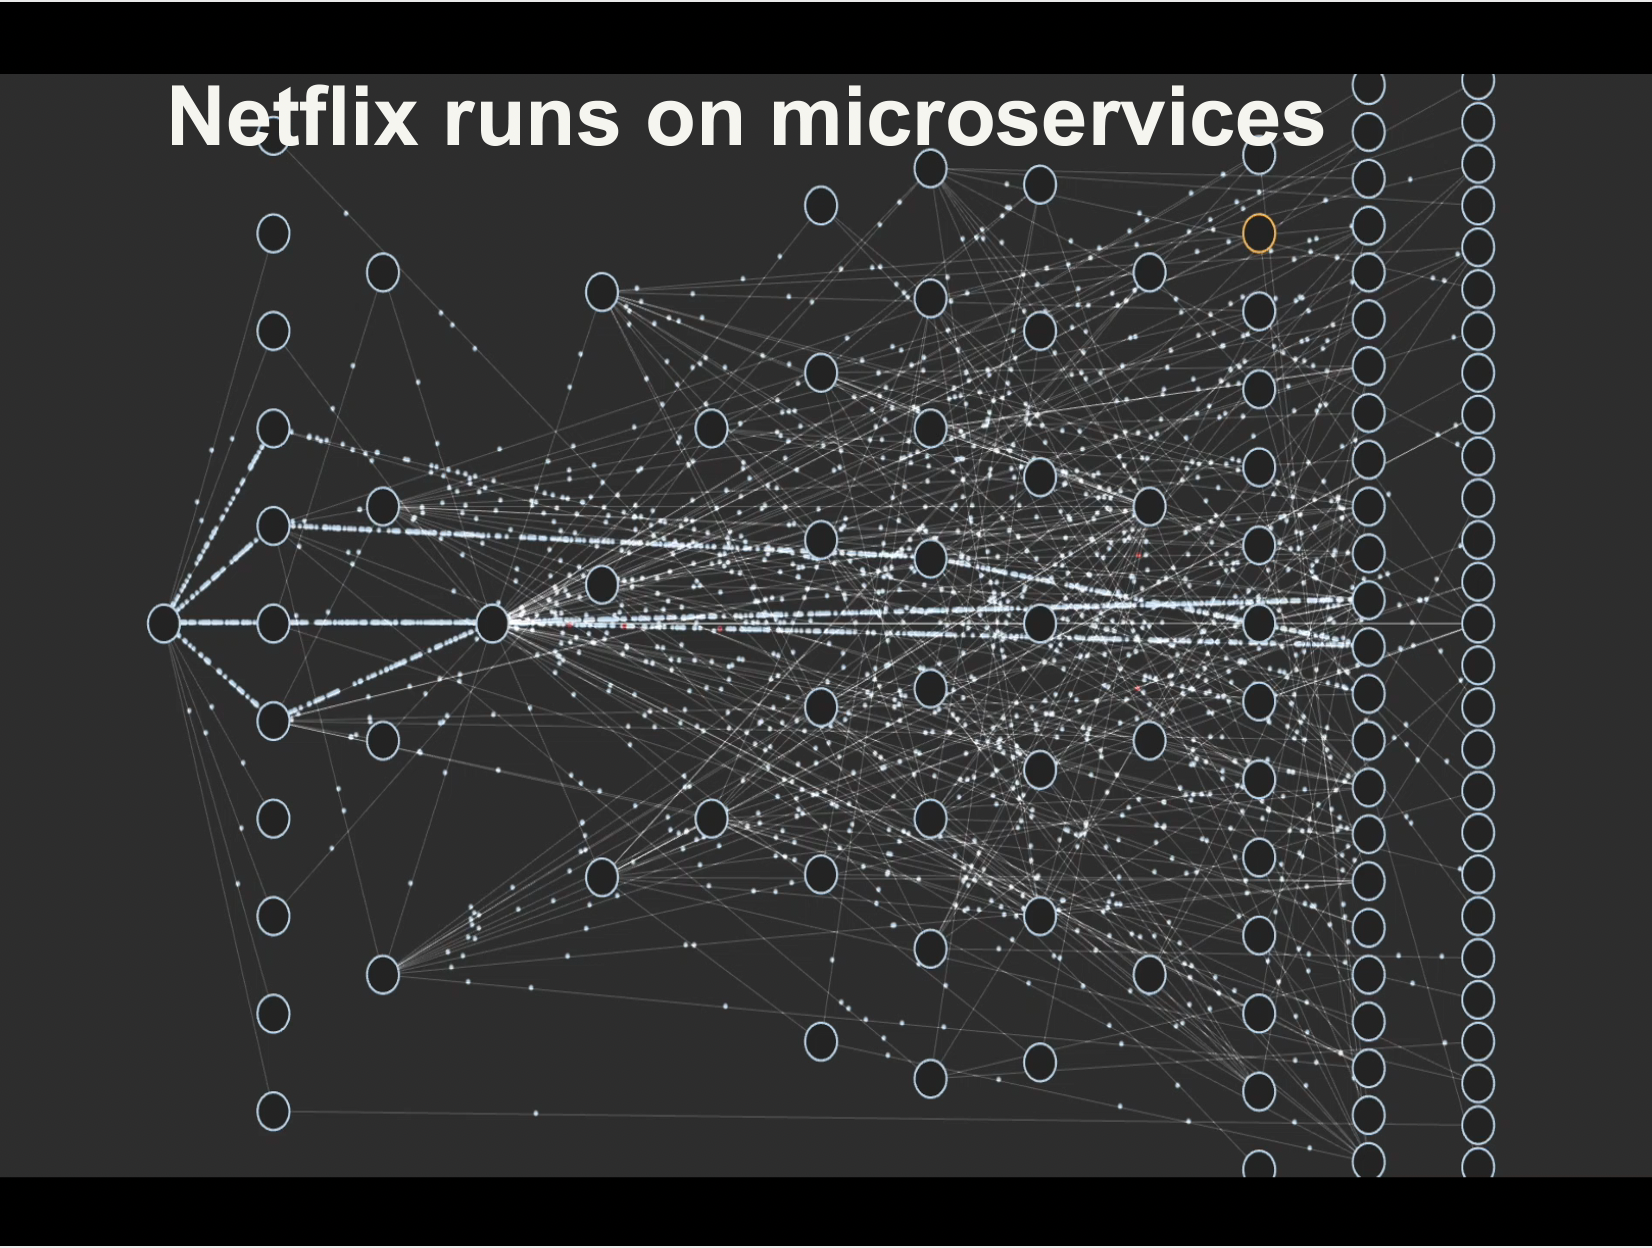
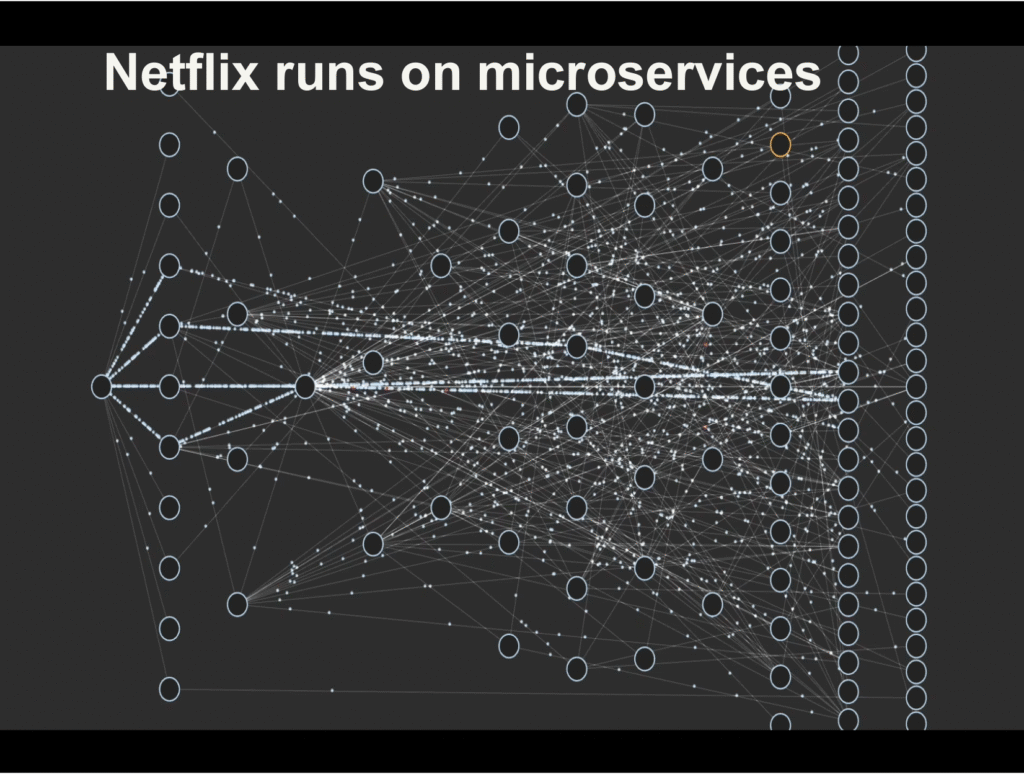
In recent years, the shift from monolithic architectures to microservices has become a popular trend in software development. This shift has been driven by the need to build more scalable, agile, and resilient systems, particularly in the context of modern cloud environments. In this article, we will explore the differences between monolithic and microservices architectures, the benefits and challenges of adopting microservices, and some best practices for making the transition successfully.
Monolithic Architecture
Monolithic architecture is a traditional way of building software applications where all the components of the system are tightly coupled together into a single codebase. The codebase usually consists of a single executable that includes all the functionality of the application. Monolithic applications typically have a layered architecture with a presentation layer, business logic layer, and data access layer. All the functionality of the application is implemented in these layers, and they are tightly coupled together.
Monolithic architecture has been the dominant approach for many years. It is relatively easy to develop and deploy, and it is straightforward to test and maintain. However, monolithic applications can become complex and unwieldy as they grow in size and complexity. Changes to one part of the application can have unintended consequences in other parts of the system, and this can make it challenging to introduce new features or make changes to the existing functionality.
Microservices Architecture
Microservices architecture is an alternative approach to building software applications. In a microservices architecture, the application is decomposed into a set of small, independent services that communicate with each other using APIs or message queues. Each service is responsible for a specific business capability, and it can be developed, deployed, and scaled independently of the other services in the system.
Microservices architecture provides several benefits over monolithic architecture. It allows for greater agility, as each service can be developed and deployed independently. This means that new features can be introduced more quickly, and changes to the existing functionality can be made without affecting the other parts of the system. Microservices also allow for greater scalability, as each service can be scaled independently based on its specific requirements. Additionally, microservices architecture can improve resilience, as failures in one service do not necessarily affect the other services in the system.
Benefits of Adopting Microservices
There are several benefits to adopting microservices architecture:
Greater agility: Microservices architecture allows for greater agility, as each service can be developed, deployed, and scaled independently. This means that new features can be introduced more quickly, and changes to the existing functionality can be made without affecting the other parts of the system.
Improved scalability: Microservices architecture allows for greater scalability, as each service can be scaled independently based on its specific requirements. This means that you can scale the parts of the system that need it most, without having to scale the entire system.
Better resilience: Microservices architecture can improve resilience, as failures in one service do not necessarily affect the other services in the system. This means that you can isolate failures and minimize their impact on the rest of the system.
Better fault isolation: Microservices architecture allows for better fault isolation, as failures in one service do not necessarily affect the other services in the system. This means that you can isolate failures and minimize their impact on the rest of the system.
Improved development velocity: Microservices architecture can improve development velocity, as each service can be developed independently. This means that you can introduce new features more quickly, and make changes to the existing functionality without affecting the other parts of the system.
Challenges of Adopting Microservices
Adopting microservices architecture can be challenging, and there are several key challenges that need to be addressed:
Complexity: Microservices architecture is more complex than monolithic architecture, as it involves multiple services communicating with each other. This can make the system more difficult to understand and manage.
Distributed systems: Microservices architecture involves building distributed systems, which can be more difficult to design, implement, and test than monolithic systems.
Operational overhead: Microservices architecture can increase operational overhead, as there are more services to deploy, manage, and monitor.
Inter-service communication: In a microservices architecture, services communicate with each other using APIs or message queues. This can introduce latency and increase the complexity of the system.
Data management: Microservices architecture can make data management more challenging, as data may be spread across multiple services.
Best Practices for Adopting Microservices
To successfully adopt microservices architecture, there are several best practices that should be followed:
Start small: Start with a small, well-defined service that can be developed, deployed, and tested quickly. This will allow you to get a feel for microservices architecture and identify any challenges early on.
Design for failure: In a microservices architecture, failures will happen. Design your system to be resilient to failures, and ensure that failures in one service do not affect the other services in the system.
Use API gateways: Use API gateways to manage the communication between services. This will make it easier to manage the system, and allow you to introduce new services more easily.
Automate everything: Automation is key to managing a microservices architecture at scale. Use automation tools to deploy, manage, and monitor your services.
Embrace DevOps: DevOps practices are essential for managing a microservices architecture. Embrace DevOps principles such as continuous integration, continuous delivery, and infrastructure as code.
Conclusion
The shift from monolithic architecture to microservices architecture is a trend that is likely to continue in the coming years. Microservices architecture offers several benefits over monolithic architecture, including greater agility, improved scalability, and better resilience. However, adopting microservices architecture can be challenging, and there are several key challenges that need to be addressed. By following best practices such as starting small, designing for failure, using API gateways, automating everything, and embracing DevOps, organizations can successfully make the transition from monolithic to microservices architecture and realize the benefits of this modern approach to building software applications.
Elasticsearch is a powerful search engine and data analytics tool that is designed to be easy to use and highly scalable. It is built on top of the Apache Lucene search engine library and provides a distributed, RESTful search and analytics engine that is widely used in a variety of industries. In this article, we will introduce Elasticsearch for beginners and explain some of its key features and benefits.
What is Elasticsearch?
Elasticsearch is a search engine that is used to search and analyze large volumes of data in real-time. It is an open-source search engine that is designed to be scalable, fault-tolerant, and distributed. Elasticsearch can be used for a wide range of use cases, including log analysis, full-text search, e-commerce search, and business analytics.
Elasticsearch Architecture
Elasticsearch has a distributed architecture, which means that data is stored across multiple nodes in a cluster. Each node in the cluster can store and search data, and nodes communicate with each other to ensure that data is distributed and replicated across the cluster. Elasticsearch can be deployed on-premises, in the cloud, or in a hybrid environment.
Elasticsearch Features
Full-Text Search: Elasticsearch is designed for full-text search, which means that it can search for keywords and phrases in the content of documents. Elasticsearch uses an inverted index to store and search documents, which makes it fast and efficient at searching large volumes of data.
Scalability: Elasticsearch is designed to be highly scalable, which means that it can handle large volumes of data and traffic. Elasticsearch can be scaled horizontally by adding more nodes to the cluster, which makes it easy to handle increasing amounts of data.
Fault-Tolerance: Elasticsearch is designed to be fault-tolerant, which means that it can handle node failures without losing data. Elasticsearch uses replication to ensure that data is replicated across multiple nodes in the cluster, which makes it resilient to node failures.
Analytics: Elasticsearch can be used for data analytics, which means that it can be used to search and analyze data in real-time. Elasticsearch provides a powerful query language that can be used to search and filter data, and it also provides aggregation functions that can be used to summarize and group data.
RESTful API: Elasticsearch provides a RESTful API that can be used to interact with the search engine. The API can be used to perform searches, index documents, and manage the cluster. The RESTful API makes it easy to integrate Elasticsearch with other systems and applications.
Plugins: Elasticsearch provides a plugin architecture that allows developers to extend Elasticsearch with additional functionality. There are many plugins available for Elasticsearch that provide features such as security, monitoring, and visualization.
How to Use Elasticsearch
Install Elasticsearch: The first step in using Elasticsearch is to install it. Elasticsearch can be downloaded from the Elasticsearch website, and it can be installed on a variety of platforms, including Windows, Mac, and Linux.
Index Data: The next step is to index data in Elasticsearch. Data can be indexed using the Elasticsearch API, which can be used to add documents to the search index. Data can also be indexed using Logstash, which is a data processing pipeline that can be used to ingest and process data.
Search Data: Once data has been indexed in Elasticsearch, it can be searched using the Elasticsearch API. Searches can be performed using the query language, which can be used to search for keywords and phrases in the content of documents. Elasticsearch provides a wide range of search capabilities, including fuzzy searches, phrase searches, and wildcard searches.
Analyze Data: Elasticsearch provides powerful analytics capabilities that can be used to analyze data in real-time. Analytics can be performed using the aggregation framework, which can be used to summarize and group data. Aggregations can be used to perform calculations, such as counting the number of documents that match a query, or finding the minimum or maximum value of a field in the search index.
Visualize Data: Elasticsearch provides a variety of visualization tools that can be used to create charts and graphs based on search results. Visualization tools can be used to create dashboards that display data in real-time, and they can be used to create reports that provide insights into data trends.
Monitor Elasticsearch: Elasticsearch provides a variety of tools for monitoring the search engine. Monitoring tools can be used to monitor the health of the cluster, track resource usage, and identify performance bottlenecks. Monitoring tools can also be used to monitor the status of indexing and search operations.
Example
here’s an example of how to use Elasticsearch with Python:
1- Install Elasticsearch and Python Elasticsearch client:
First, make sure you have Elasticsearch installed on your machine or server. Then, install the Python Elasticsearch client using pip:
pip install elasticsearch
2- Connect to Elasticsearch:
Next, create a connection to your Elasticsearch cluster using the Elasticsearch Python client:
from elasticsearch import Elasticsearch

es = Elasticsearch()
This will connect to Elasticsearch running on your localhost on the default port 9200. You can also specify a different host and port if needed.
3- Create an index:
Before you can store data in Elasticsearch, you need to create an index. An index is like a database in a traditional SQL database system. To create an index, use the create_index() method:
This will create an index called my_index with one shard and no replicas. It will also define two fields: title and description, both of which are of type text.
4- Add data to the index:
Once you have created an index, you can add data to it. To add data, use the index() method:
doc = {
    'title': 'First document',
    'description': 'This is the first document'
}

res = es.index(index=index_name, body=doc)
This will add a new document to the my_index index with the title and description fields.
5- Search for data:
To search for data in Elasticsearch, use the search() method:
search_body = {
    'query': {
        'match': {
            'title': 'first'
        }
    }
}

res = es.search(index=index_name, body=search_body)

for hit in res['hits']['hits']:
    print(hit['_source'])
This will search for documents in the my_index index that have the word “first” in the title field. It will then print out the _source field of each document that matches the query.
6- Delete the index:
Finally, when you’re done with an index, you can delete it using the delete() method:
es.indices.delete(index=index_name)
This will delete the my_index index.
Conclusion
Elasticsearch is a powerful search engine and data analytics tool that is widely used in a variety of industries. It provides a distributed, RESTful search and analytics engine that is designed to be scalable, fault-tolerant, and easy to use. Elasticsearch can be used for a wide range of use cases, including log analysis, full-text search, e-commerce search, and business analytics. If you’re new to Elasticsearch, there are many resources available online to help you get started, including documentation, tutorials, and community forums. With its powerful features and flexible architecture, Elasticsearch is a great choice for anyone looking to build scalable, real-time search and analytics applications.
SQLite is a widely used open-source relational database management system (RDBMS) that has gained popularity among developers for its ease of use, small footprint, and flexibility. It is an embedded SQL database engine that can be used in various programming languages and platforms. However, despite its popularity, using SQLite in production environments is generally not recommended. In this article, we will discuss some of the reasons why you should not use SQLite in production.
Concurrency
SQLite uses a file-based approach to store data, which means that a single file is used to store the entire database. This file can be accessed by multiple threads or processes simultaneously. However, SQLite’s concurrency control mechanism is not as robust as that of other relational databases, such as MySQL or PostgreSQL. For example, SQLite locks the entire database file when a write operation is being performed, which can lead to performance issues when multiple users or processes are trying to write to the database simultaneously.
Scalability
SQLite is designed to be a lightweight database engine that can be embedded in various applications. However, it is not designed for high scalability or high availability. As SQLite is a file-based database, it can become slow when the database file size grows beyond a certain limit. Also, SQLite does not support clustering or replication out-of-the-box, which means that scaling the database horizontally can be challenging.
Limited Feature Set
SQLite is a great choice for small-scale applications or prototyping because of its small footprint and ease of use. However, it has a limited feature set compared to other relational databases. For example, it does not support stored procedures, triggers, or views. While these features may not be essential for small-scale applications, they are important for large-scale, complex applications.
Lack of Professional Support
SQLite is an open-source database engine that is maintained by a group of volunteers. While the SQLite community is active and provides support through mailing lists and forums, there is no formal professional support available for SQLite. This can be a concern for organizations that rely on their databases for mission-critical applications.
No Client-Server Architecture
SQLite does not have a client-server architecture, which means that it does not support network access out-of-the-box. This can be a disadvantage for applications that require multiple users to access the database simultaneously from different locations. While there are workarounds to enable network access to SQLite, they can be complicated to implement and may not be as secure as a client-server architecture.
Lack of Security Features
SQLite does not have the same level of security features as other relational databases. For example, it does not support role-based access control, which means that it is difficult to implement fine-grained access control for database objects. Also, SQLite does not have native support for encryption, which means that sensitive data stored in SQLite databases can be vulnerable to unauthorized access.
Conclusion
While SQLite is a great choice for small-scale applications or prototyping, it is not recommended for production environments. SQLite’s limited scalability, concurrency control, feature set, and security features make it unsuitable for large-scale, mission-critical applications. If you are looking for a relational database that is suitable for production environments, consider using MySQL, PostgreSQL, or Oracle instead. These databases offer better scalability, concurrency control, feature sets, and security features that are essential for production environments.
Kubernetes is an open-source container orchestration platform that automates the deployment, scaling, and management of containerized applications. One of the key features of Kubernetes is the ability to perform zero downtime deployment, which means deploying a new version of an application without causing any disruption to end-users. In this blog post, we will explore the concept of zero downtime deployment in Kubernetes and how it can be achieved.
What is Zero Downtime Deployment?
Zero downtime deployment is the process of deploying a new version of an application without causing any downtime or service interruption. This means that end-users can continue to use the application without any interruption, even while the new version is being deployed. This is particularly important for applications that require high availability, as downtime can lead to loss of revenue and customer dissatisfaction.
How Kubernetes Achieves Zero Downtime Deployment
Kubernetes achieves zero downtime deployment through a technique called Rolling Updates. Rolling Updates allow Kubernetes to deploy new versions of an application gradually, one instance at a time, while keeping the existing instances running. This means that Kubernetes can update an application without taking it offline.
Rolling Updates work by creating a new ReplicaSet with the updated version of the application and gradually increasing the number of replicas in the new ReplicaSet while decreasing the number of replicas in the old ReplicaSet. This process continues until all replicas in the old ReplicaSet have been replaced by replicas in the new ReplicaSet. Once the process is complete, the old ReplicaSet is deleted, and the new ReplicaSet takes over.
To achieve zero downtime deployment, Kubernetes uses the following steps:
Create a new ReplicaSet: Kubernetes creates a new ReplicaSet with the updated version of the application.
Gradually increase the number of replicas in the new ReplicaSet: Kubernetes gradually increases the number of replicas in the new ReplicaSet, one instance at a time.
Gradually decrease the number of replicas in the old ReplicaSet: Kubernetes gradually decreases the number of replicas in the old ReplicaSet, one instance at a time.
Verify the health of the new ReplicaSet: Kubernetes verifies the health of the new ReplicaSet to ensure that all instances are running correctly.
Delete the old ReplicaSet: Once the new ReplicaSet has been fully deployed and verified, Kubernetes deletes the old ReplicaSet.
Example
here’s an example of how Kubernetes achieves zero downtime deployment:
Let’s say you have a web application running in Kubernetes with four instances, each serving user requests. You want to deploy a new version of the application without causing any downtime. Here’s how Kubernetes achieves this:
Create a new ReplicaSet: Kubernetes creates a new ReplicaSet with the updated version of the application.
                       +---+
New ReplicaSet (v2)    | 1 |
                       +---+
Gradually increase the number of replicas in the new ReplicaSet: Kubernetes starts creating new instances of the updated application in the new ReplicaSet, while keeping the old ReplicaSet running. At this point, you have four instances running in the old ReplicaSet and zero instances in the new ReplicaSet.
Gradually decrease the number of replicas in the old ReplicaSet: Kubernetes starts scaling down the old ReplicaSet, one instance at a time. For example, it may start by scaling down the old ReplicaSet to three instances and scaling up the new ReplicaSet to one instance. At this point, you have three instances running in the old ReplicaSet and one instance in the new ReplicaSet.
Verify the health of the new ReplicaSet: Kubernetes verifies the health of the new ReplicaSet to ensure that all instances are running correctly. If any issues arise, Kubernetes can stop the deployment and roll back to the previous version.
Continue scaling down the old ReplicaSet: Kubernetes continues scaling down the old ReplicaSet and scaling up the new ReplicaSet until all instances in the old ReplicaSet have been replaced by instances in the new ReplicaSet. At this point, you have zero instances running in the old ReplicaSet and four instances in the new ReplicaSet.
By using this process, Kubernetes can deploy new versions of an application gradually, one instance at a time, while keeping the existing instances running. This ensures that the application remains available to end-users during the deployment process, without causing any disruption to the user experience.
Benefits of Zero Downtime Deployment
Zero downtime deployment offers several benefits, including:
Increased availability: Zero downtime deployment ensures that the application remains available to end-users during the deployment process.
Reduced risk: By gradually deploying the new version of the application, Kubernetes reduces the risk of service disruption and enables quick rollback if issues arise.
Improved user experience: Zero downtime deployment ensures that end-users can continue to use the application without any interruption, leading to a better user experience.
Conclusion
Zero downtime deployment is a critical feature of Kubernetes that enables the deployment of new versions of an application without causing any disruption to end-users. Kubernetes achieves this through Rolling Updates, a technique that gradually deploys new versions of an application while keeping the existing instances running. By using zero downtime deployment, organizations can increase the availability of their applications, reduce risk, and improve the user experience.
Amazon Web Services (AWS) is a cloud computing platform that provides a wide range of services, including computing, storage, and database services, to name a few. As the demand for cloud computing continues to grow, the need for certified professionals who can manage these services efficiently also increases. AWS Certified Solution Architect Associate Exam is an entry-level certification exam that validates the candidate’s knowledge of AWS architectural principles and services. In this blog post, we will discuss how to pass the AWS Certified Solution Architect Associate Exam in two months with a practical guide but first, we need to understand why.
Why you should get the AWS Certified Solution Architect Associate certificate?
Passing the AWS Certified Solution Architect Associate Exam can benefit your career in several ways. Here are a few reasons why you should consider getting certified:
Increased Career Opportunities: AWS is the leading cloud computing platform, and companies are increasingly adopting it for their infrastructure needs. As a certified AWS Solution Architect Associate, you will have a competitive advantage over non-certified professionals in the job market. This certification can help you land job roles such as AWS Solutions Architect, Cloud Engineer, and Cloud Infrastructure Architect.
Enhanced Credibility: AWS Solution Architect Associate certification is a globally recognized and respected credential. It demonstrates your knowledge and skills in designing and deploying scalable, highly available, and fault-tolerant systems on AWS. This certification can enhance your credibility and increase your professional reputation.
Higher Salary: Certified professionals generally earn higher salaries than their non-certified counterparts. According to a survey conducted by Global Knowledge, AWS Solution Architect Associate certified professionals earn an average salary of $130,883 per year. This certification can help you negotiate a higher salary or secure a job with a higher pay scale.
Continuous Learning: AWS regularly updates its services and features, and certified professionals are required to stay up-to-date with these changes. This certification requires you to continue learning and improving your skills, which can help you stay relevant in the industry.
The AWS Certified Solution Architect Associate Exam is a challenging exam that requires dedication, commitment, and a solid understanding of AWS services and architecture principles.
While the exam is challenging, it is not impossible to pass. With the right study plan, practice, and dedication, you can increase your chances of passing the exam. The practical guide outlined in this blog post can help you prepare for the exam in two months and increase your chances of passing.
Step 1: Understanding the Exam
The AWS Certified Solution Architect Associate Exam tests the candidate’s knowledge of AWS architectural principles and services, as well as their ability to design and deploy scalable, highly available, and fault-tolerant systems on AWS. The exam consists of 65 multiple-choice questions that need to be answered within 130 minutes. The exam fee is $150, and the passing score is 720 out of 1000.
Step 2: Setting a Study Plan
To pass the AWS Certified Solution Architect Associate Exam, you need to create a study plan that works for you. Since the exam covers a wide range of topics, it is essential to set realistic study goals and stick to them. A two-month study plan should be sufficient for most candidates.
Week 1-2: AWS Fundamentals
Week 1-2 of preparing for the AWS Certified Solution Architect Associate Exam focuses on learning the fundamentals of AWS. In this section, you will learn about AWS core services, cloud computing basics, and AWS architecture principles. Here are some topics to focus on during this period:
AWS Core Services: You should start by learning about the core services of AWS, including Elastic Compute Cloud (EC2), Simple Storage Service (S3), and Relational Database Service (RDS). These services are fundamental to most AWS applications and are essential for designing scalable and highly available systems.
Cloud Computing Basics: You should also learn about the basics of cloud computing, including the different deployment models (Public, Private, and Hybrid Clouds) and service models (Infrastructure as a Service, Platform as a Service, and Software as a Service).
AWS Architecture Principles: You should learn about AWS architecture principles, including designing for availability, scalability, and fault tolerance. This includes understanding the different AWS regions and availability zones and how to design your application for maximum availability and resilience.
AWS Security: You should learn about AWS security best practices, including identity and access management, network security, and data encryption. You should also understand how to secure your AWS infrastructure against common security threats.
Hands-on Practice: In addition to studying the theory, you should also practice using AWS services through the AWS Free Tier. This will help you become familiar with the AWS console and give you practical experience with using AWS services.
During this period, you should aim to complete the AWS Certified Cloud Practitioner Exam (if you haven’t already done so). This exam covers the fundamentals of AWS and will give you a solid foundation for preparing for the AWS Certified Solution Architect Associate Exam.
Week 1-2 of preparing for the AWS Certified Solution Architect Associate Exam focuses on learning the fundamentals of AWS, including core services, cloud computing basics, AWS architecture principles, security, and hands-on practice. By mastering these topics, you will be well-prepared for the rest of your study plan.
Week 3-4: Compute Services
Week 3-4 of preparing for the AWS Certified Solution Architect Associate Exam focuses on learning about AWS compute services. In this section, you will learn about the different compute services offered by AWS, including Elastic Compute Cloud (EC2), Elastic Container Service (ECS), Elastic Kubernetes Service (EKS), and Lambda. Here are some topics to focus on during this period:
Elastic Compute Cloud (EC2): You should start by learning about EC2, which is a scalable and highly available compute service that allows you to launch and manage virtual machines (instances) in the cloud. You should learn about the different types of instances, instance purchasing options, storage options, and networking options available in EC2.
Elastic Container Service (ECS) and Elastic Kubernetes Service (EKS): You should also learn about containerization and how to deploy and manage containerized applications on AWS using ECS and EKS. You should learn about the different deployment options, load balancing, and scaling options available in these services.
Lambda: You should learn about serverless computing and how to use AWS Lambda to run your code without provisioning or managing servers. You should learn about the different trigger options available in Lambda, including API Gateway, S3, and CloudWatch Events.
Autoscaling: You should also learn about autoscaling and how to automatically adjust the number of instances running in your application based on demand. You should learn about the different types of autoscaling policies available in AWS and how to configure them.
Hands-on Practice: As with the previous week, you should also practice using these services through the AWS Free Tier. This will help you become familiar with the AWS console and give you practical experience with using these services.
During this period, you should also start practicing for the AWS Certified Solution Architect Associate Exam by taking practice tests and reviewing sample questions. This will help you become familiar with the exam format and the types of questions you can expect to see on the actual exam.
Week 3-4 of preparing for the AWS Certified Solution Architect Associate Exam focuses on learning about AWS compute services, including EC2, ECS, EKS, Lambda, and autoscaling. By mastering these topics, you will be well-prepared for the compute-related questions that may appear on the exam.
Week 5-6: Storage Services
Week 5-6 of preparing for the AWS Certified Solution Architect Associate Exam focuses on learning about AWS storage services. In this section, you will learn about the different storage services offered by AWS, including Simple Storage Service (S3), Elastic Block Store (EBS), Glacier, and Elastic File System (EFS). Here are some topics to focus on during this period:
Simple Storage Service (S3): You should start by learning about S3, which is a highly scalable and durable object storage service. You should learn about the different storage classes available in S3, including S3 Standard, S3 Intelligent-Tiering, S3 Standard-Infrequent Access, and S3 One Zone-Infrequent Access. You should also learn about S3 security, including access control policies, encryption options, and bucket policies.
Elastic Block Store (EBS): You should also learn about EBS, which provides block-level storage volumes for use with EC2 instances. You should learn about the different volume types available in EBS, including General Purpose SSD (GP2), Provisioned IOPS SSD (IO1), and Throughput Optimized HDD (ST1).
Glacier: You should learn about Glacier, which is a low-cost archival storage service. You should learn about the different storage classes available in Glacier, including Glacier Standard, Glacier Expedited, and Glacier Bulk.
Elastic File System (EFS): You should also learn about EFS, which provides scalable file storage for use with EC2 instances. You should learn about the different performance modes available in EFS, including General Purpose and Max I/O. You should also learn about EFS security, including access control policies and encryption options.
Hands-on Practice: As with the previous weeks, you should also practice using these services through the AWS Free Tier. This will help you become familiar with the AWS console and give you practical experience with using these services.
During this period, you should also continue practicing for the AWS Certified Solution Architect Associate Exam by taking practice tests and reviewing sample questions. This will help you become more familiar with the exam format and the types of questions you can expect to see on the actual exam.
Week 5-6 of preparing for the AWS Certified Solution Architect Associate Exam focuses on learning about AWS storage services, including S3, EBS, Glacier, and EFS. By mastering these topics, you will be well-prepared for the storage-related questions that may appear on the exam.
Week 7-8: Network Services and Security
Week 7-8 of preparing for the AWS Certified Solution Architect Associate Exam focuses on learning about AWS network services and security. In this section, you will learn about the different networking services offered by AWS, including Virtual Private Cloud (VPC), Route 53, Direct Connect, and Elastic Load Balancing (ELB). You will also learn about security-related topics, including Identity and Access Management (IAM), Key Management Service (KMS), and AWS Organizations. Here are some topics to focus on during this period:
Virtual Private Cloud (VPC): You should start by learning about VPC, which is a logical isolated section of the AWS Cloud that allows you to launch AWS resources in a virtual network. You should learn about VPC components, including subnets, security groups, and network ACLs. You should also learn about VPC peering, VPC endpoints, and NAT gateway.
Route 53: You should learn about Route 53, which is a scalable and highly available Domain Name System (DNS) service. You should learn about how to create and manage DNS records, including A records, CNAME records, and MX records.
Direct Connect: You should also learn about Direct Connect, which provides dedicated network connections between your on-premises data center and AWS. You should learn about the different connection options available in Direct Connect, including dedicated connections and hosted connections.
Elastic Load Balancing (ELB): You should learn about ELB, which distributes incoming traffic across multiple targets, such as EC2 instances or containers. You should learn about the different types of load balancers available in ELB, including Application Load Balancer, Network Load Balancer, and Classic Load Balancer.
Identity and Access Management (IAM): You should also learn about IAM, which provides centralized control of AWS resources. You should learn about IAM users, groups, and roles, and how to use IAM policies to control access to AWS resources.
Key Management Service (KMS): You should learn about KMS, which provides managed encryption keys that you can use to encrypt your data stored in AWS. You should learn about the different types of keys available in KMS, including customer master keys (CMKs) and data encryption keys (DEKs).
AWS Organizations: You should also learn about AWS Organizations, which allows you to manage multiple AWS accounts centrally. You should learn about how to create and manage AWS accounts, and how to use service control policies (SCPs) to control access to AWS services.
Hands-on Practice: As with the previous weeks, you should also practice using these services through the AWS Free Tier. This will help you become familiar with the AWS console and give you practical experience with using these services.
Week 7-8 of preparing for the AWS Certified Solution Architect Associate Exam focuses on learning about AWS network services and security, including VPC, Route 53, Direct Connect, ELB, IAM, KMS, and AWS Organizations. By mastering these topics, you will be well-prepared for the networking and security-related questions that may appear on the exam.
Step 3: Practice, Practice, Practice
One of the most critical steps in preparing for the AWS Certified Solution Architect Associate Exam is practicing. You should take as many practice exams as possible to get a feel for the exam format and the types of questions that will be asked. AWS provides a free practice exam on their website, which you should take before the actual exam. Additionally, there are many third-party practice exams available, such as those from Whizlabs, Udemy, and A Cloud Guru.
Step 4: Stay Up-to-Date with AWS Services
AWS regularly releases new services and features, so it is essential to stay up-to-date with these changes. You should subscribe to AWS newsletters and blogs to keep up with the latest news and updates. Additionally, you should regularly review the AWS documentation to ensure that you are familiar with the latest features and services.
Step 5: Exam Day
Step 5: Exam Day is the final step in your journey to becoming an AWS Certified Solution Architect Associate. Here are some tips to help you prepare for and succeed on exam day:
Review your notes and study materials: On the day before the exam, take some time to review your notes and study materials. This will help refresh your memory on the topics you have been studying and help you identify any areas where you may need to focus your attention.
Get a good night’s sleep: It’s important to be well-rested on exam day, so make sure to get a good night’s sleep. Try to go to bed early, and avoid consuming caffeine or alcohol before bedtime.
Eat a healthy breakfast: On the morning of the exam, make sure to eat a healthy breakfast. This will help give you the energy you need to stay focused and alert during the exam.
Arrive early: Plan to arrive at the testing center at least 30 minutes before your scheduled exam time. This will give you plenty of time to check in, review the exam rules, and get settled before the exam begins.
Bring the necessary materials: Make sure to bring a valid form of government-issued identification, such as a passport or driver’s license, to the testing center. You should also bring a pen and paper, as well as any other materials allowed by the testing center.
Stay calm and focused: During the exam, it’s important to stay calm and focused. If you encounter a question that you don’t know the answer to, don’t panic. Take a deep breath, and move on to the next question. You can always come back to difficult questions later.
Pace yourself: The AWS Certified Solution Architect Associate Exam consists of 65 questions, and you have 130 minutes to complete the exam. This means you have an average of just over two minutes per question. Make sure to pace yourself, and don’t spend too much time on any one question.
Review your answers: After you have answered all of the questions, take some time to review your answers. Make sure you have answered every question, and double-check your answers to ensure they are accurate.
Celebrate your success: After you have completed the exam, take some time to celebrate your success. Becoming an AWS Certified Solution Architect Associate is a significant accomplishment, and you should be proud of your hard work and dedication.
Conclusion
Passing the AWS Certified Solution Architect Associate Exam requires dedication, commitment, and a solid understanding of AWS services and architecture principles. It also requires a significant amount of time and effort. By following the practical guide outlined in this blog post, you can prepare for the exam in two months and increase your chances of passing. Remember to set a realistic study plan, practice, stay up-to-date with AWS services, and arrive early on exam day. Good luck with your exam!
Monitoring is a crucial aspect of Site Reliability Engineering (SRE) because it allows teams to detect, diagnose, and resolve issues in distributed systems. In this article, we’ll explore the principles of monitoring and best practices for monitoring distributed systems.
First principle: Measure what matters
Teams should identify key performance indicators (KPIs) that directly impact user experience and business outcomes. These KPIs should be tracked over time, and teams should establish service level objectives (SLOs) that define acceptable levels of performance.
Second principle: Understand dependencies
Distributed systems are composed of many components, and it’s essential to understand how they interact with each other. Teams should create dependency diagrams that show the relationships between components and use them to prioritize monitoring efforts.
Third principle: Define actionable alerts
Teams should create alerts that trigger when KPIs deviate from acceptable levels. Alerts should be designed to be actionable, meaning they should provide enough context to help teams diagnose and resolve issues quickly. It’s also essential to ensure that alerts are not too noisy, so teams don’t become desensitized to them.
Fourth principle: Automation
Manual monitoring is error-prone, time-consuming, and difficult to scale. Teams should invest in automated monitoring tools that can detect issues in real-time and provide insights into the root cause of the problem.
Fifth principle: End-to-End monitoring
Monitoring should cover the entire system, from the user interface to the backend infrastructure. Teams should use synthetic monitoring to simulate user interactions and track performance from the user’s perspective.
After an incident, teams should conduct a post-incident analysis to understand what happened, why it happened, and how it can be prevented in the future. This analysis should involve all stakeholders, including developers, operators, and business owners.
To implement these principles effectively, teams should use a monitoring framework that provides a consistent approach to monitoring. The monitoring framework should define monitoring goals, identify KPIs, establish SLOs, create alerts, and automate monitoring tasks. It should also integrate with other tools and systems, such as incident management tools, log analysis tools, and dashboards.
In conclusion, monitoring is essential to maintaining the reliability and performance of distributed systems. By following these principles and best practices, teams can develop effective monitoring strategies that help them detect, diagnose, and resolve issues quickly, ultimately improving the user experience and business outcomes.